|
|
|
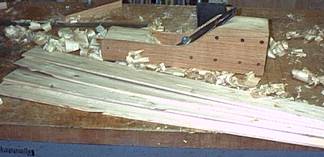 The first step in making the top after
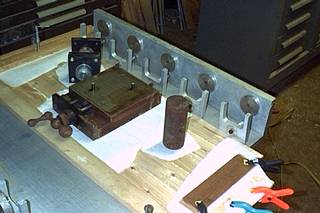
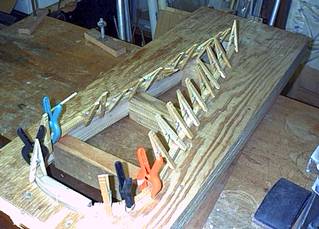
The next step is to glue the top pieces
together. To the left is a view of the
clamp system I found while wondering
around the local junk yard. It uses lock
clamps and is made of 1/2 inch thick
aluminum. To keep the pieces flat I've
used a few heavy objects in the shop.
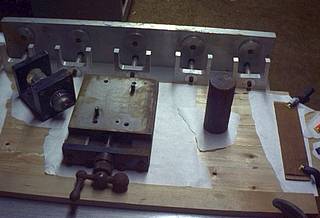
Here is another view of the clamp.
In the
future I would like to run some bars over the
top and place vertical clamps to take the
place of the weights.
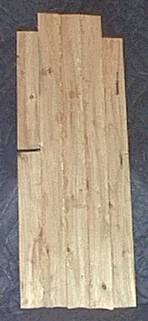
Here is a view of the top after
being removed from
the clamp. The piece on the top left is just a
filler.
Lessons learned: Wood glue will stick to aluminum.
Next time I will put wax paper under it first.
The
clamp worked well but I will need to put the vertical
clamps in to hold the stock flat.
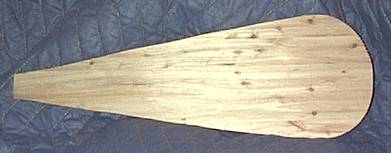
Here is a view of the top after being cut to rough
size and sanded. The average thickness is
.125.
Click here for
a close up view showing more detail.
And yes, some of those are worm holes.

The next step is to make the kerf
lining. Here is
a photo of a simple jig to do that. I used and
old
jig saw I had (broke handle) and made a simple
slide. The dept is controlled by the back stop.
Now it's time to glue the linings in place.
I sure
hope the wife doesn't need to do the wash. Cloths
pins make short work of this job and their cheap.
But the 50 cent spring clamps from wally world
are also nice. Will be getting more those.
Home Sides Top and bottom Fret board Tuning head